Flutter Component Basics - ListView#
ListView is a scrolling list, similar to ScrollView in iOS, that allows both horizontal and vertical scrolling with unlimited content.
Usage of ListView#
Using ListView is simple, but it requires practice.
To use ListView, you need to set the children property, where each item in children is a Widget object.
Vertical Scrolling#
The code is as follows:
class MyApp extends StatelessWidget {
@override
Widget build(BuildContext context) {
return MaterialApp(
title: 'ListView Learn',
home: Scaffold(
appBar: new AppBar(
title: new Text('ListView Widget')
),
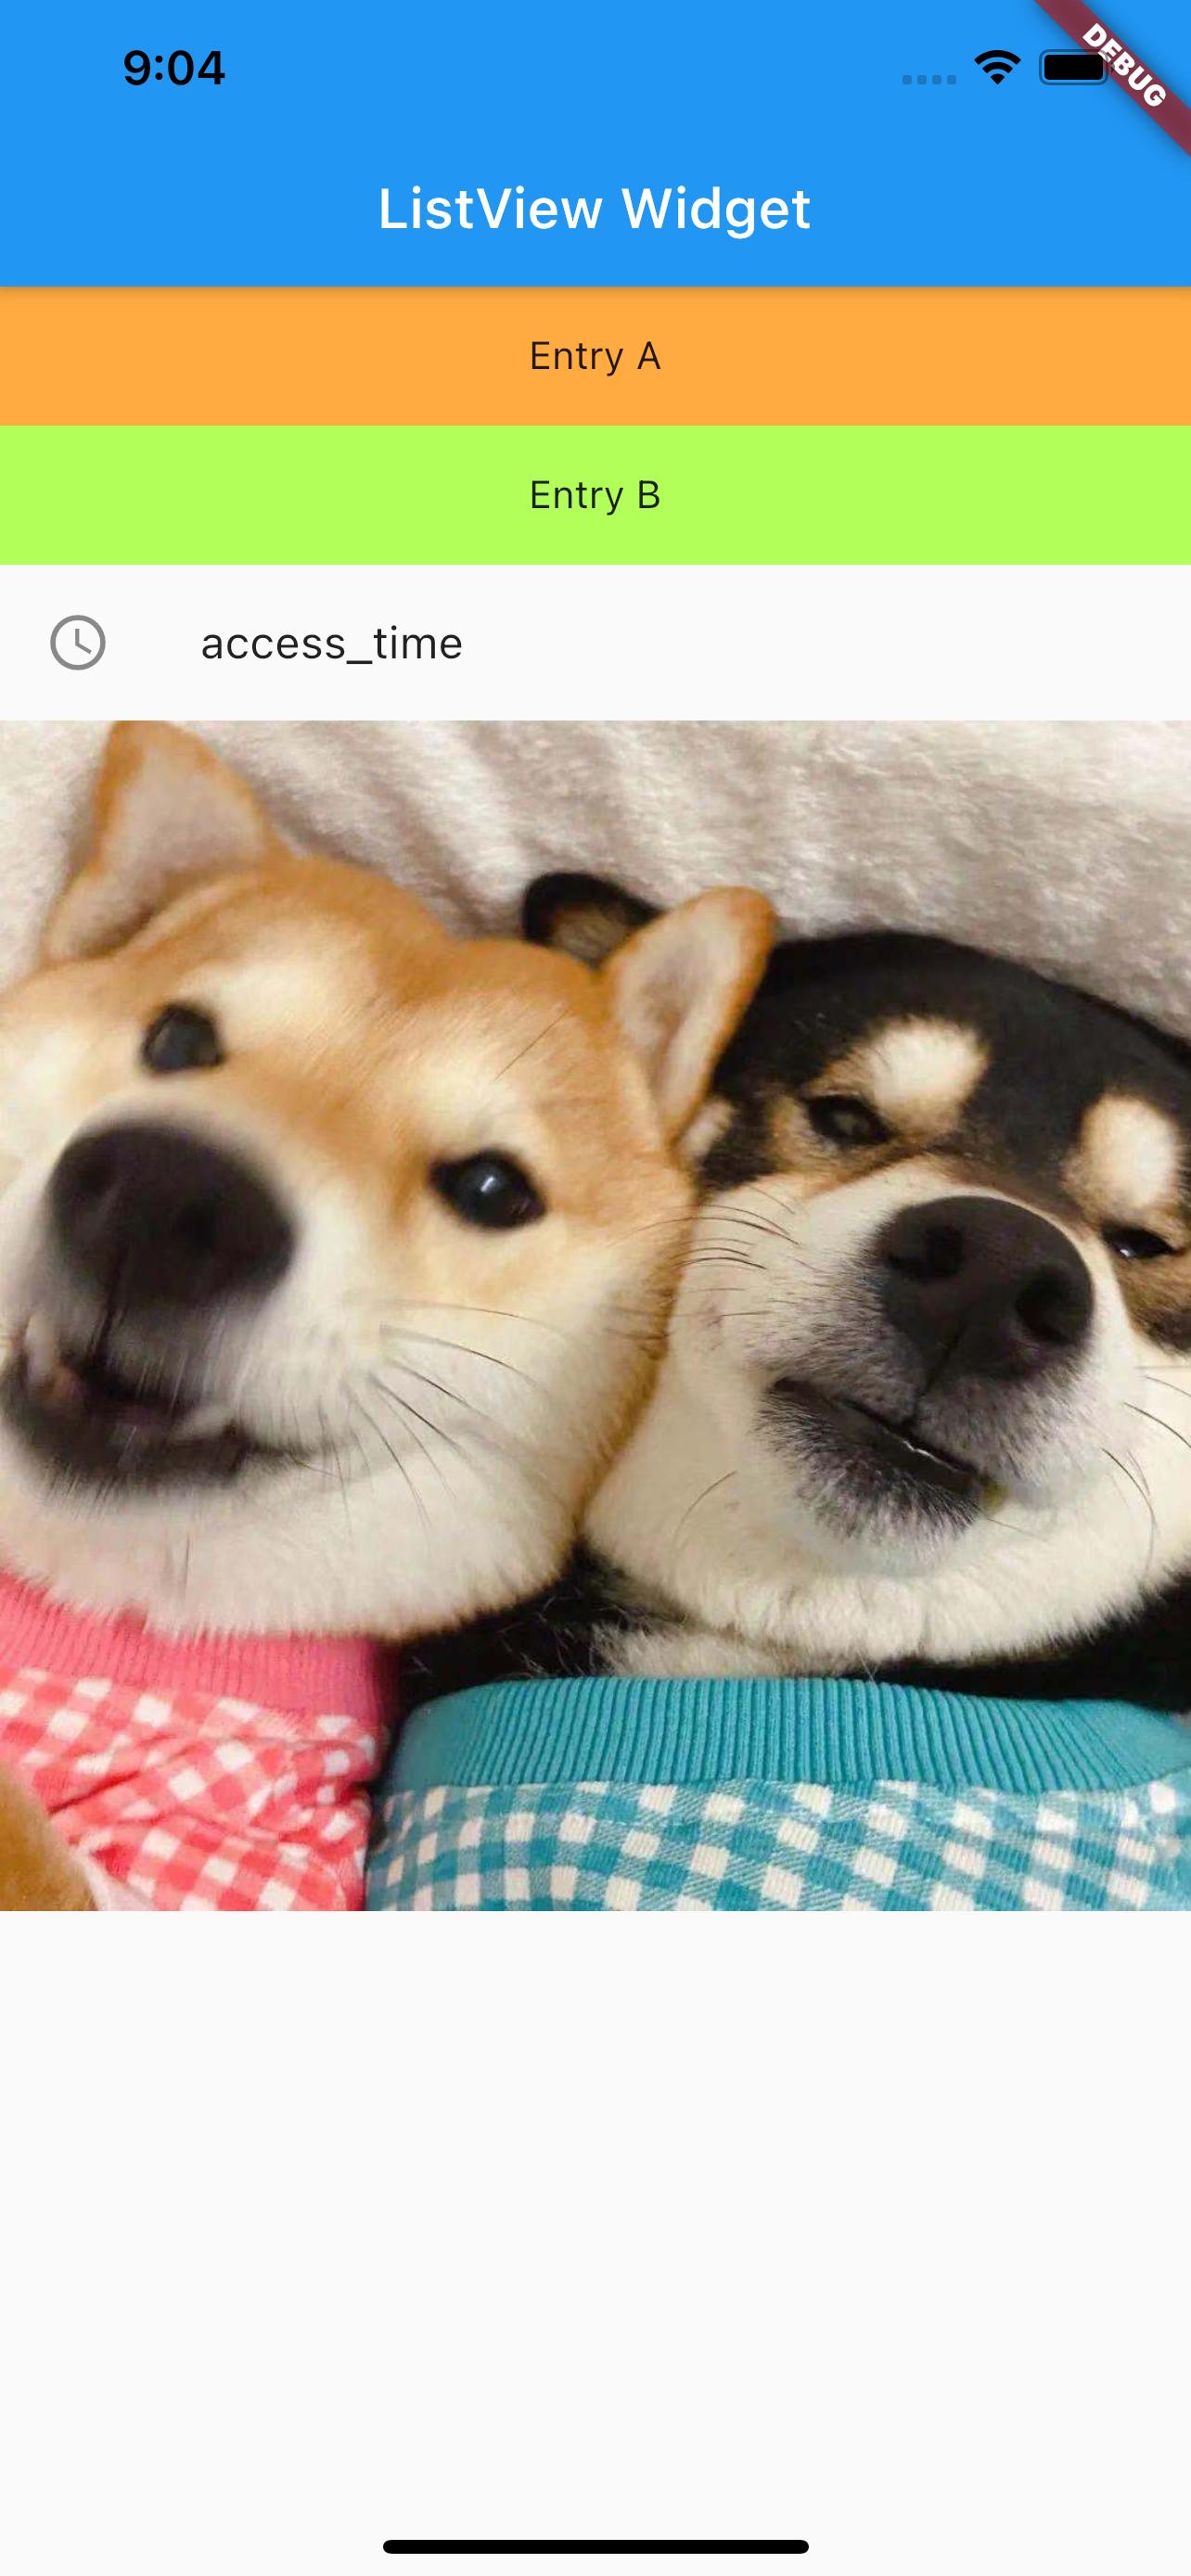
body: new ListView(
children: <Widget>[
Container(
height: 50,
color: Colors.orangeAccent,
child: const Center(
child: Text('Entry A'),
),
),
Container(
height: 50,
color: Colors.lightGreenAccent,
child: const Center(
child: Text('Entry B'),
),
),
new ListTile(
leading: new Icon(Icons.access_time),
title: new Text('access_time'),
),
new Image.network(
'https://inews.gtimg.com/newsapp_ls/0/13792660143/0.jpeg')
],
)
)
);
}
}
The result is as follows:
Horizontal Scrolling#
The scrollDirection property of ListView controls the scrolling direction.
The code is as follows:
class MyList extends StatelessWidget {
  @override
  Widget build(BuildContext context) {
    return ListView(scrollDirection: Axis.horizontal, children: [
      new Container(
        width: 180.0,
        color: Colors.lightBlue,
      ),
      new Container(
        width: 180.0,
        color: Colors.lightGreen,
      ),
      new Container(
        width: 180.0,
        color: Colors.orange,
      ),
      new Container(
        width: 180.0,
        color: Colors.orangeAccent,
      )
    ]);
  }
}

class MyApp extends StatelessWidget {
  @override
  Widget build(BuildContext context) {
    return MaterialApp(
        title: 'Text Widget',
        home: Scaffold(
          body: Center(
            child: Container(
              height: 200.0,
              child: MyList(),
            ),
          ),
        ));
  }
}
The result is as follows:
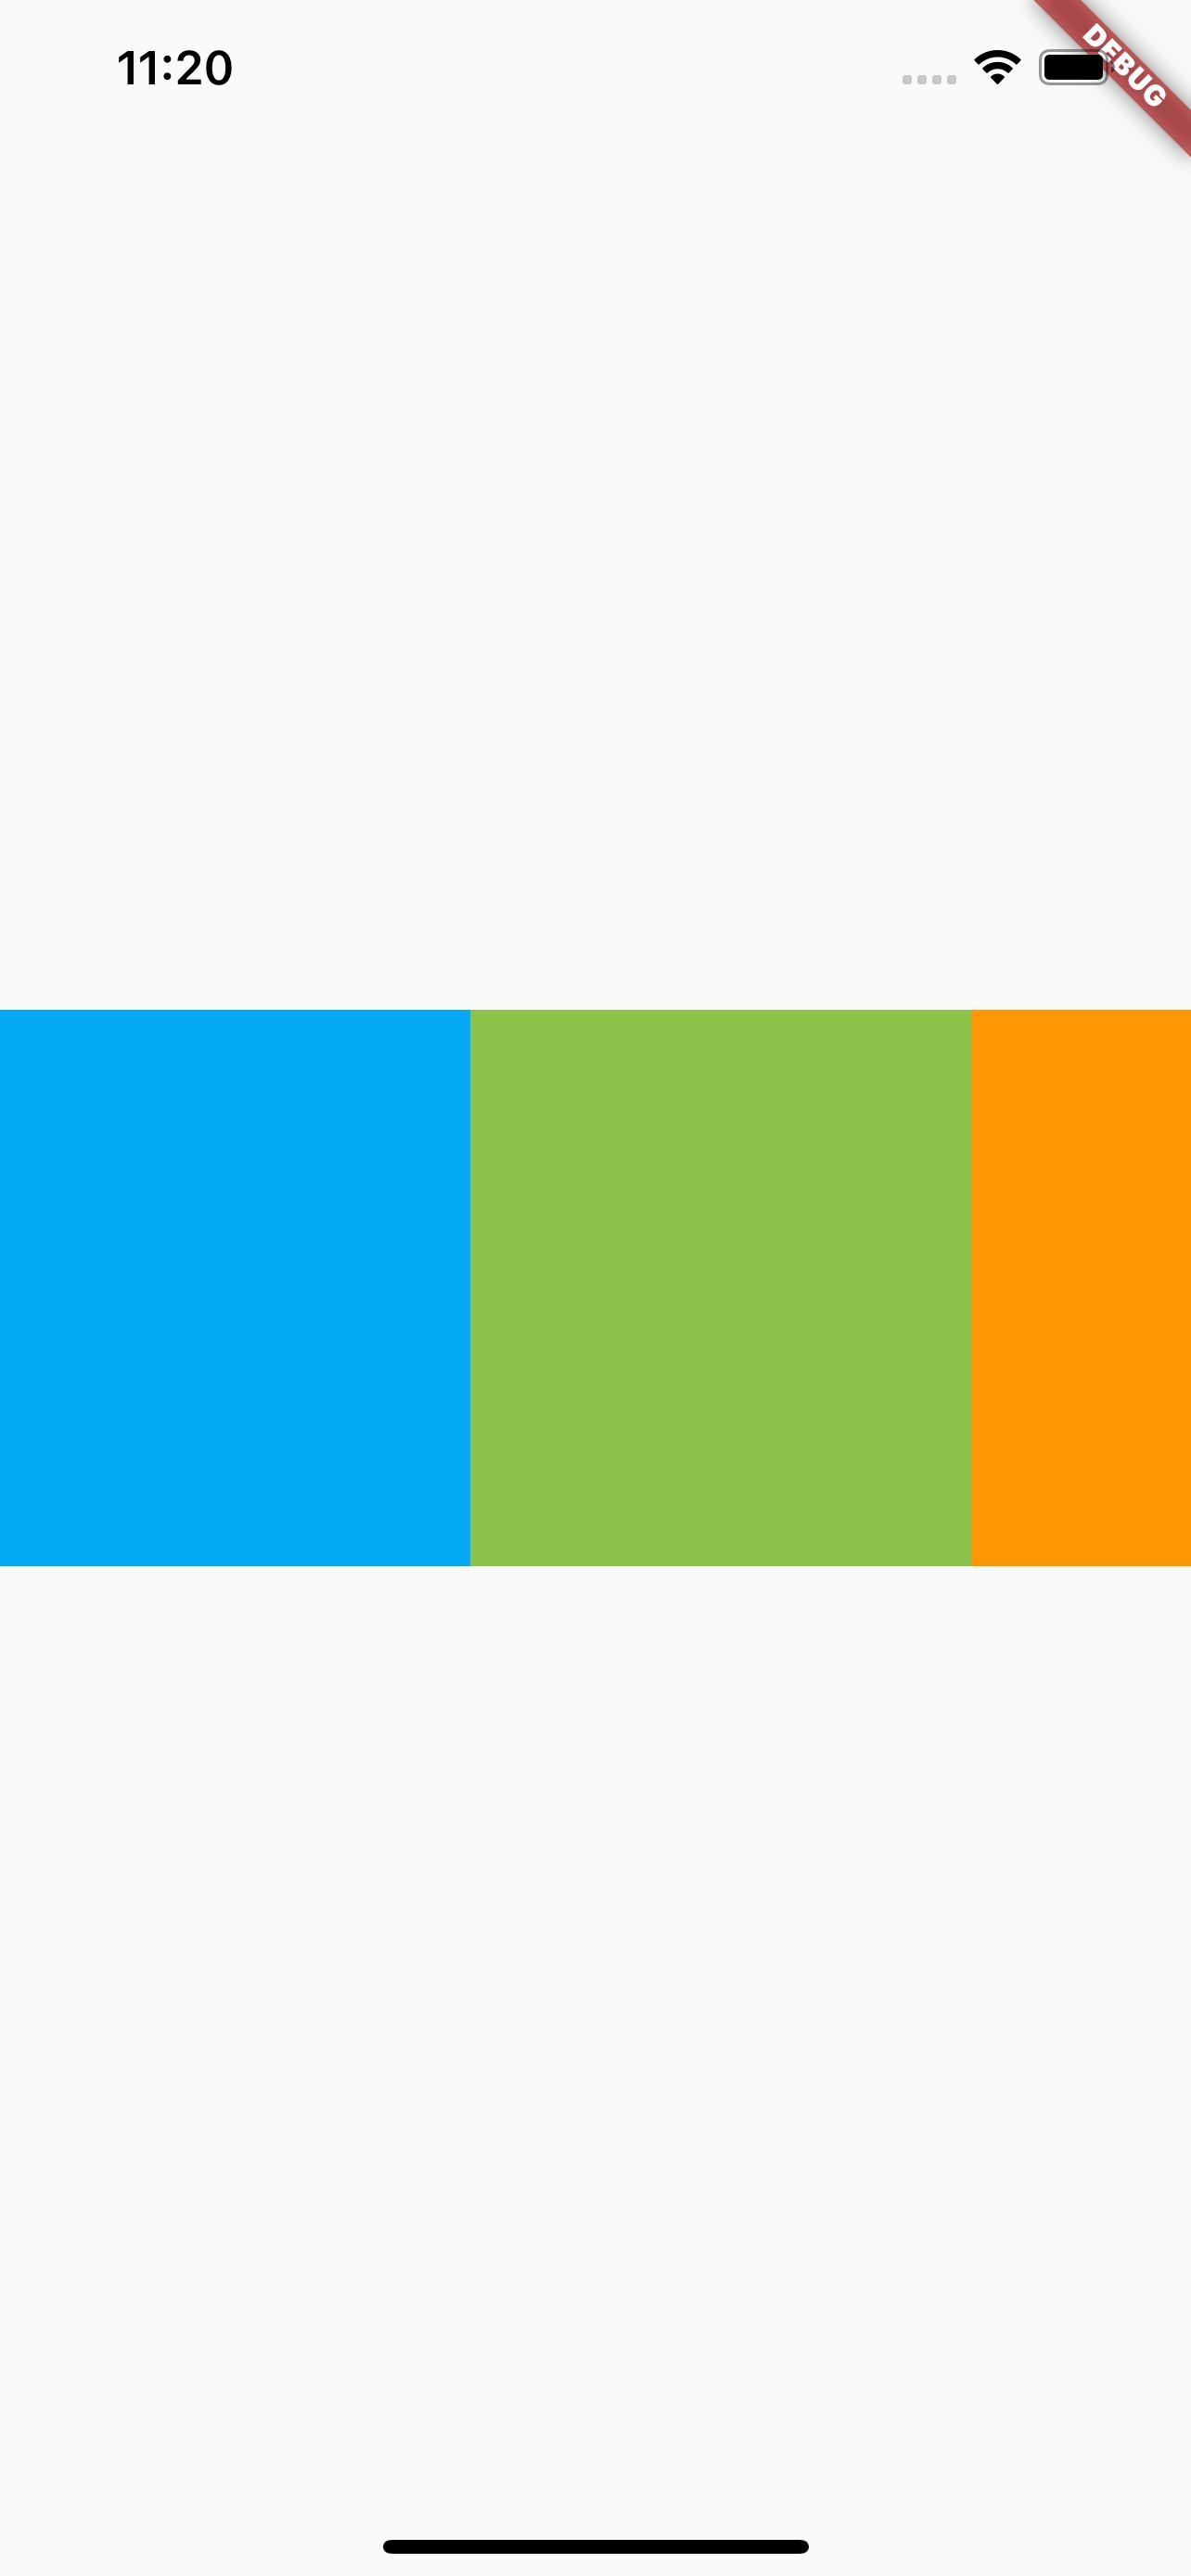
Note the different syntax here. In this case, a custom MyList widget is defined, and then MyList is used in MyApp to avoid excessive nesting in the parent view.
Dynamic List ListView.builder()#
To use a dynamic list, let's first take a look at the List type.
List Type
List is a collection type and can be declared in several ways. The usage is similar to the Array type in Swift.
var myList = List(): Creates a non-fixed-length array.var myList = List(2): Creates an array with a length of 2.var myList = List<String>(): Creates an array of type String.var myList = [1, 2, 3]: Creates an array with elements 1, 2, and 3.
You can also use the generate method to generate List elements, for example:
new List<String>.generate(1000,, (i) => "Item $i");
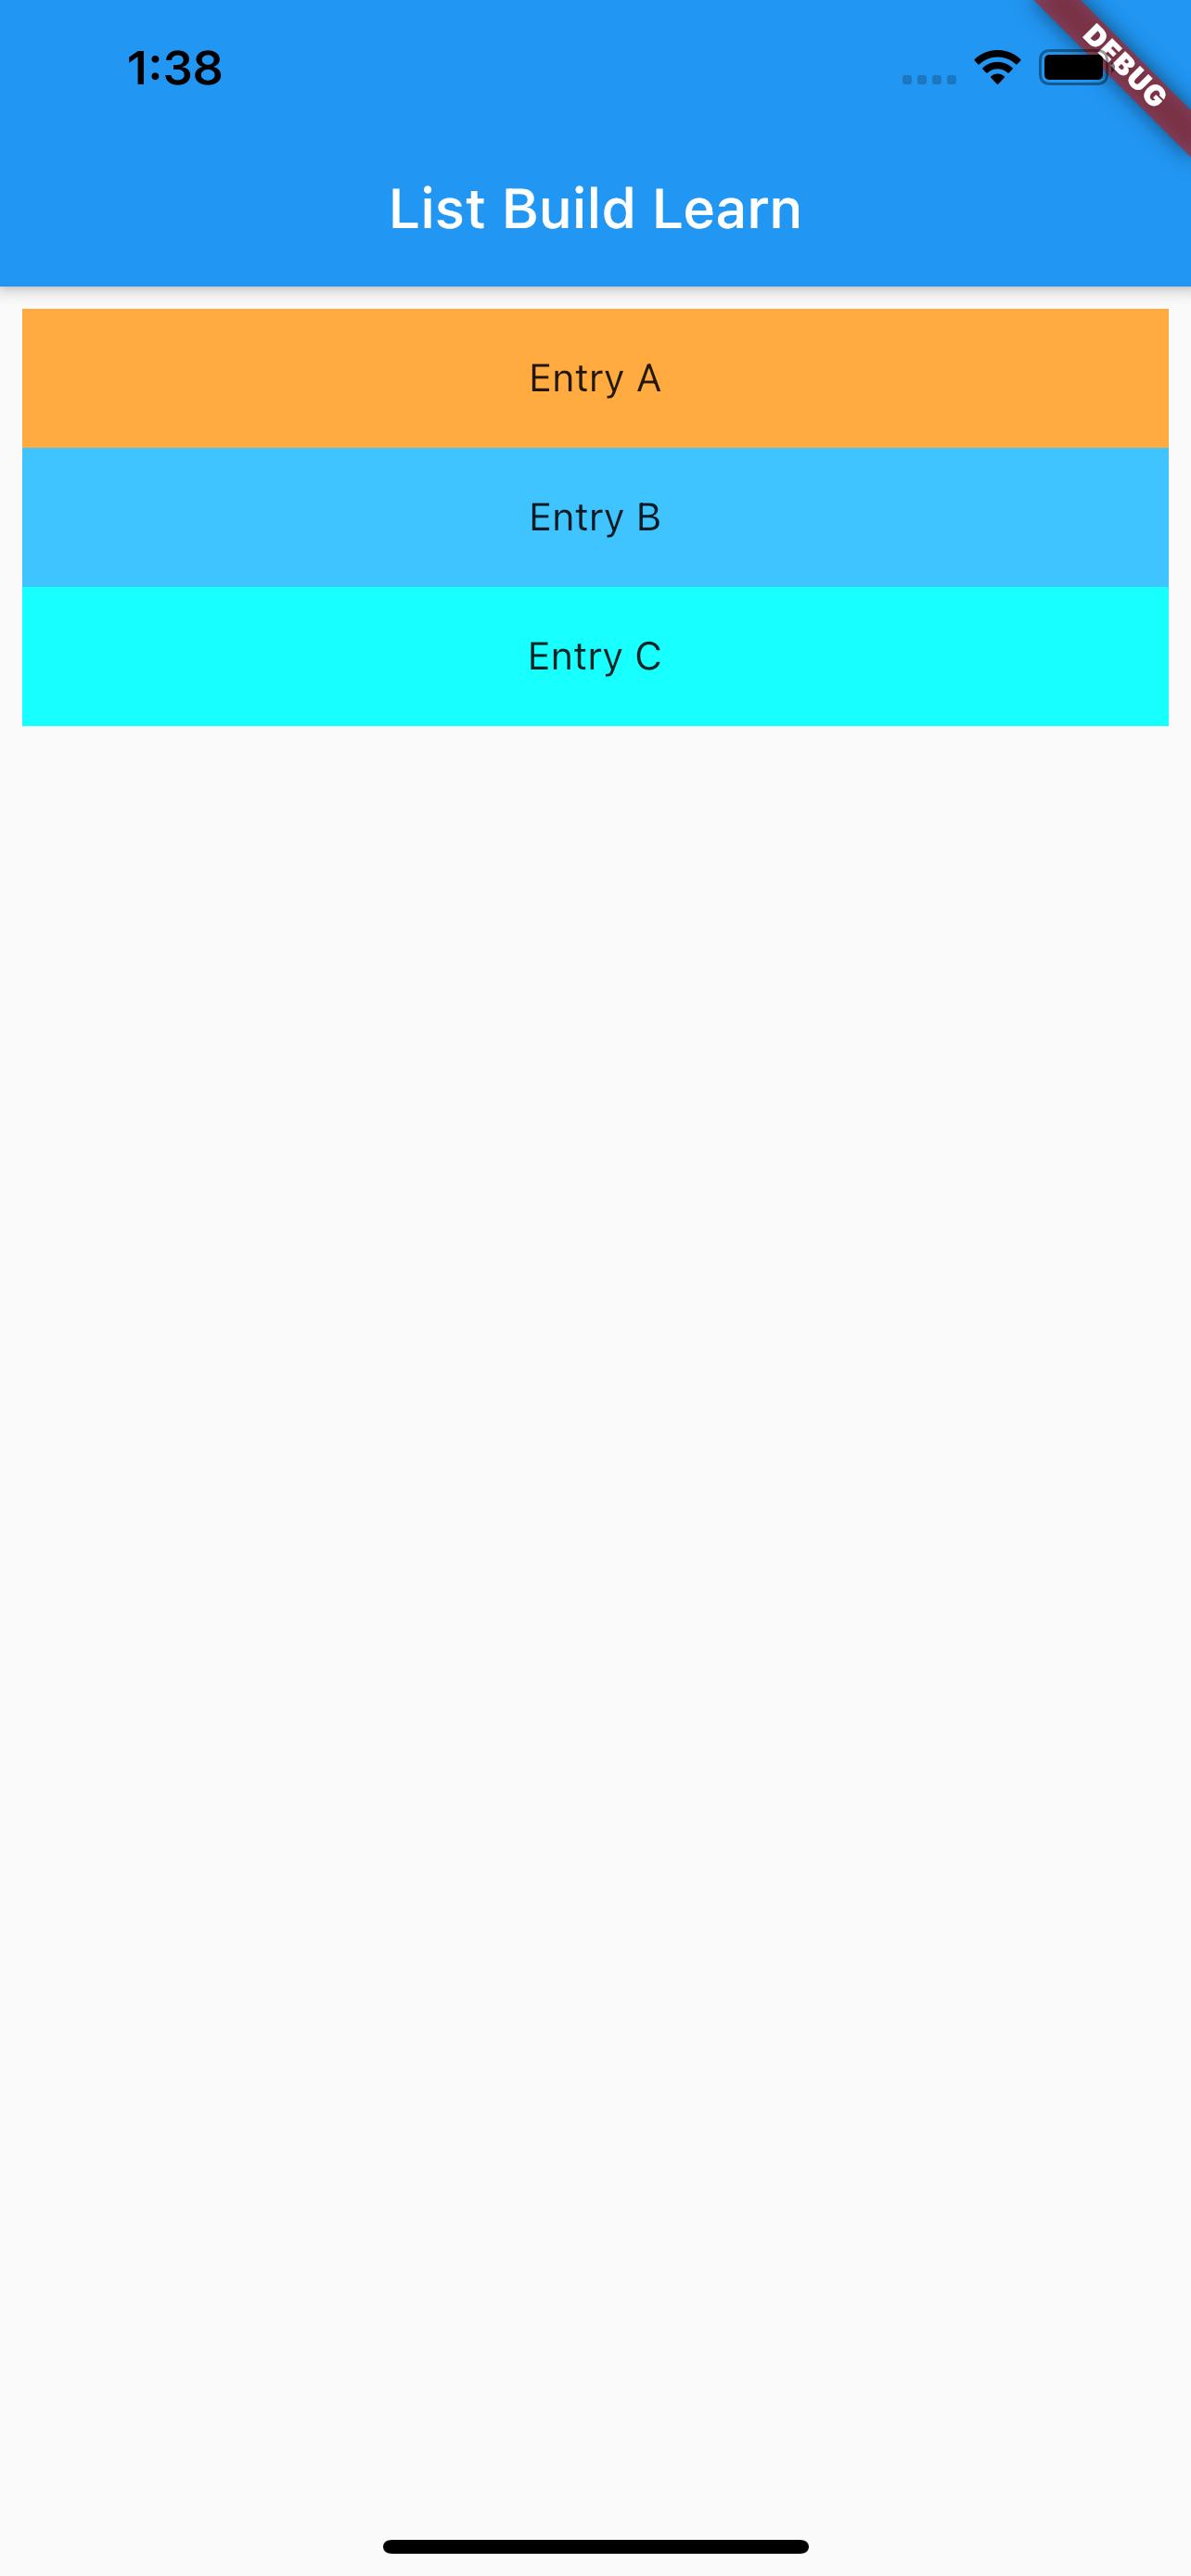
Dynamic List
The code is as follows:
class MyList extends StatelessWidget {
  final List<String> entries = <String>['A', 'B', 'C'];
  final List colors = [
    Colors.orangeAccent,
    Colors.lightBlueAccent,
    Colors.cyanAccent
  ];

  @override
  Widget build(BuildContext context) {
    return ListView.builder(
      padding: const EdgeInsets.all(8),
      itemCount: entries.length,
      itemBuilder: (BuildContext context, int index) {
        return Container(
          height: 50,
          color: colors[index],
          child: Center(
            child: Text('Entry ${entries[index]}'),
          ),
        );
      },
    );
  }
}

class MyApp extends StatelessWidget {
  @override
  Widget build(BuildContext context) {
    return MaterialApp(
        title: 'List Build Learn',
        home: Scaffold(
          appBar: new AppBar(
            title: new Text('List Build Learn'),
          ),
          body: Center(
            child: Container(
              child: MyList(),
            ),
          ),
        ));
  }
}
The result is as follows:
References#
ListView Dev Doc
Flutter Free Video Season 2 - Common Components